How to use AutoArchive feature of Outlook
Jaizz | July 28th, 2016 | MS Outlook
Archive feature of Outlook used for several purposes. It can reduce the size of mailbox when it reaches maximum level and also it can protect Outlook files from event of data loss. user can use Archive feature manually or Automatically. In this article i have illustrated the steps how to apply AutoArchive feature of Outlook.
Given Below are steps showing how to use AutoArchive feature.
outlook 2010 users follow these steps:
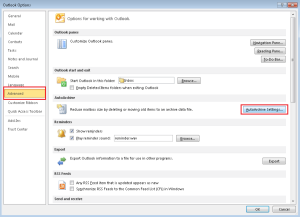
Step 1. Go to file menu and click “Options”.
Step 2. Click the Advance tab and select AutoArchive Settings
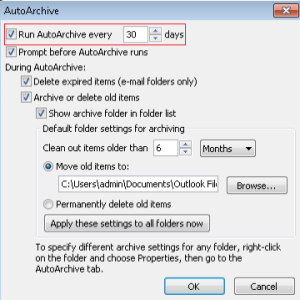
Step 3. Select the “AutoArchive Every” check box and then type a number in the “Days” box to specify how frequently AutoArchive process runs.
Step 4. In the Default archive file box, type a file name for the archived items to be transferred to, or click Browse to select from a list.
Click ok two times.
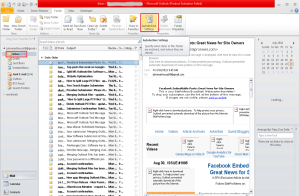
Now Select the folder that you want to archived and navigate to Folder tab and apply AutoArchive Settings.
Outlook 2007 users follow these steps:
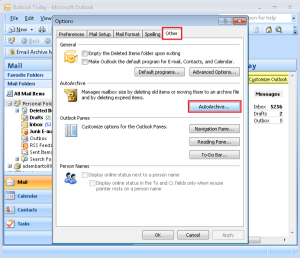
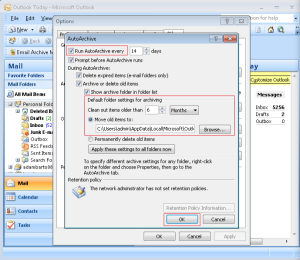
Step 1. go to tools menu >> Select “options” >> Click “other” tab >> Click AutoArchive button.
Step 2. Select the “AutoArchive Every” check box and then type a number in the “Days” box to specify how frequently AutoArchive process runs.
Step 3. In the Default archive file box, type a file name for the archived items to be transferred to, or click Browse to select from a list and then click OK.
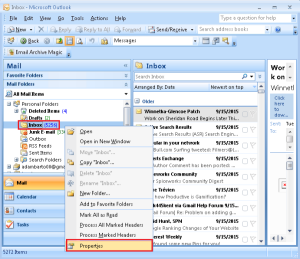
Step 4. Now Right click folder that you want to archive and select properties.
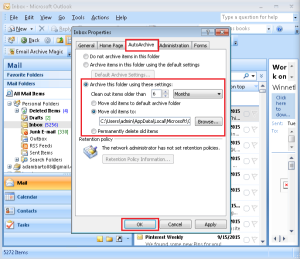
Step 5. Click AutoArchive tab >> Select “Clean out items older than”.
Enter number in “Months” section to specify when to move items in archive file automatically.
Click on “Move old item to” to specify where archive items are moved.
Now type a file name or browse a file from list and click OK.
Note:
You can also archive files manually. To know how to manually archive files in outlook go to Manual Archiving in MS Outlook
