Configure SMTP Relay Connector For Exchange Server 2010
admin | August 25th, 2014 | Exchange Server
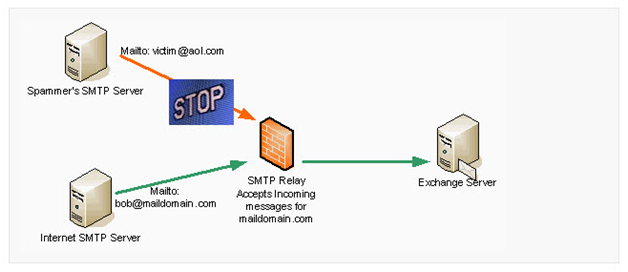
If you are aware with the concept of email spamming, then relaying must be a known concept to you, i.e. using a Server to accept an email and then sending to desired recipient. Okay, let me simplify this! xyz@a.com connects to a SMTP Server at 123.com and uses it to deliver an email to jazz@a.com.
If SMTP relay is configured properly, it can protect Exchange Server from communicating with the un-trusted SMTP Servers over internet. Basically, SMTP relay is a machine that accepts incoming and outgoing email request and then forward the messages to appropriate location. The reason why the machine is known as SMTP relay is because it does not mark the end of SMTP message. In simple words, SMTP Relay can be considered as SMTP Router. Basically, a relay is configured for incoming mails and it accepts messages for the domains that you host.
How to Configure Exchange 2010 to Send and Receive Email
A transporter Server is responsible for sending and receiving emails and for that it needs a connector to be defined. A connector specifies how a transporter Server will accepts or sends emails from/to other systems. There are two types of connectors that transporter Server uses:
Send Connectors: This defines how a transporter Server will send email to other transporter Server or system. For example: This kind of connector can be assigned in order to ensure that an email sent to abc.com will be routed to specific IP address instead of looking for Mail Exchange records for abc.com in the Domain Name Server.
Receive Connectors: This type of connector defines how a transporter Server will receive emails from other email systems or transporter server. Settings for this connectors clearly defines how the server will listen to the incoming messages and this is the why probably it is also called as Receive Listener. For example; Proper settings can help to accept email from TCP port.
How to Configure a Relay Connector for Exchange Server 2010
When a transporter server is installed, the receiver connectors are by default created. The receive connectors ensure that hub transport servers within organization can exchange messages with each other. However, there are times when an administrator wants emails to be received on specific port or IP address. In that case, following settings can be done using Exchange management Console (EMC).
Open EMC:
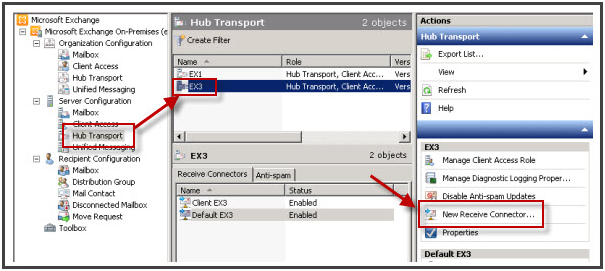
- In the console tree, select navigate to “Server Configuration”. Choose the “Hub Transport” node.
- In the results pane, you will see set of Servers listed. Choose the hub transport server on which receiver connector has to be installed.
- In the actions pane, click on “New Receiver Connector”.
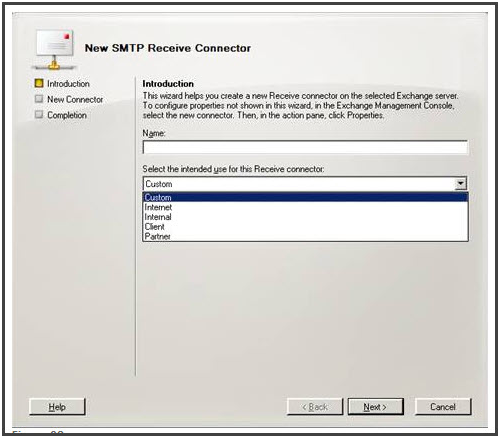
Introduction Page:
- Type a name for the receiver connector in the “Name” field.
- Select “Custom” under Select the intended use for this Receive connector field.
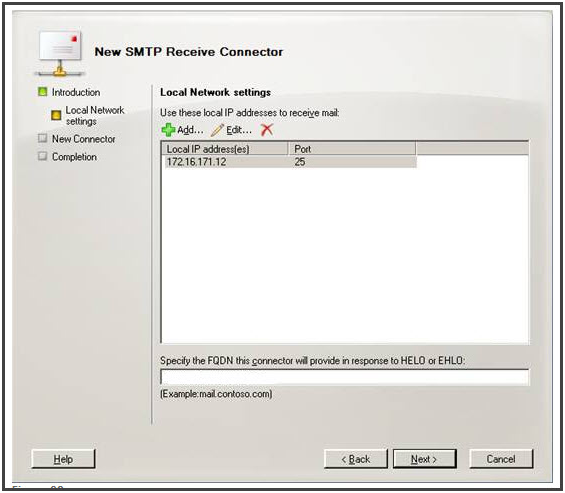
Local Network Settings:
- Select “All Available IPv4” and click delete
- Click “Add”. In the dialog box that appears, select “Specify an IP Address”. Here, provide an IP address that is assigned to network adapter on local Server.
- Type “25” in the port field and hit OK. Keep the “Specify the FQDN this connector…” field blank.
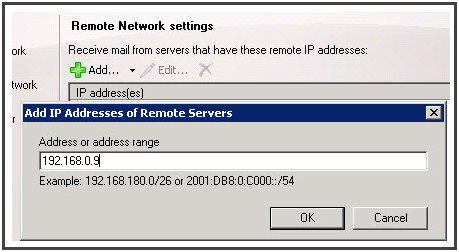
Remote Network Settings:
- Select the existing entry, i.e. “0.0.0.0 – 255.255.255.255” and click delete icon
- Click on the drop down arrow next to “Add” option. Provide IP address or IP Address Range for remote messaging server that will be responsible for replaying. Click OK.
New Connector:
Review the configuration summary that is being provided for receive connector. To make any changes, click on “Back” button. Click on “New” button to instruct the application that all credentials are being provided from your end and receive connector creation should be started.
Completion
Once the process is complete, click on “Finish” button
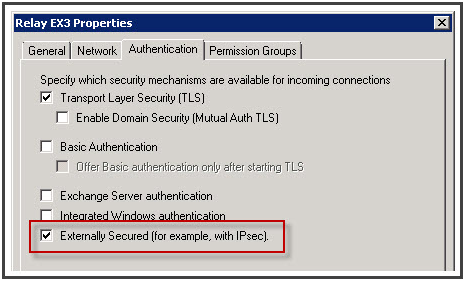
After this process, the receive connector is created but it is not ready for email relaying. For that, go to EMC, select the receive connector you created, right-click on it and choose “Properties”.
Click on “Permissions group” tab and select “Exchange Servers”
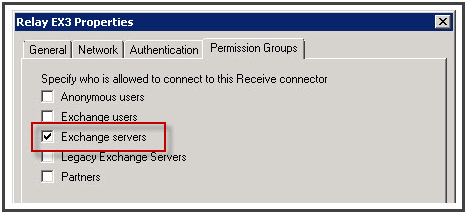
Under “Authentication” tab, click “Externally Secured”
How To Create Accepted Domain In Exchange 2010
There is a list of SMTP domain that Exchange entrusts for incoming emails. There are three types of Accepted domains:
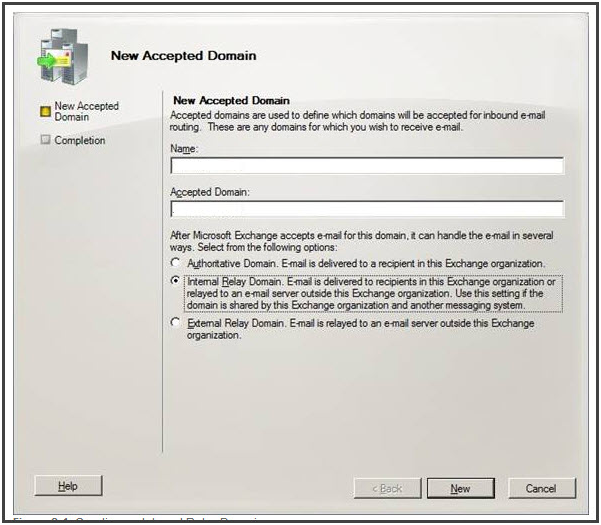
Authoritative Domain: If a domain is an authoritative domain, then there must exist a mailbox for recipients. If abc.com is authoritative domain and a message being sent to xyz@abc.com will be accepted by Exchange if xyz have a mailbox else a non-delivery report will be sent to the sender.
Internal Relay Domain: In this case, if no mailbox exists for the recipient, the message will be sent to “Send connector” that is a domain address space representative. Such domains prove quite helpful in scenarios where Exchange is sharing domain address space with other email system. So in this case, the message is first sent to Exchange Server and if it does not contain any mailbox, the message will be passed to the Server that is configured with Send Connector.
External Relay Domain: In this case, Exchange will not check out for mailbox in organization and will rather directly pass the message to Send connector
To configure Accepted Domain for Exchange using Exchange Management Console, follow the steps mentioned below:
- Open EMC and move to “Organization Configuration” in the console tree. Select “Hub Transport” node. In the actions pane, click on “New Accepted Domain”.
- In the wizard that appears, enter a convenient name for the accepted domain under the “Name” field.
- Specify what action should Exchange takes when an email arrives with a particular domain name.
- Click “New” to start creation of a new accepted domain.
- When the process is complete, click on “Finish” button.